Appearance
Estimates
You can access the estimates tab from the sidebar menu.
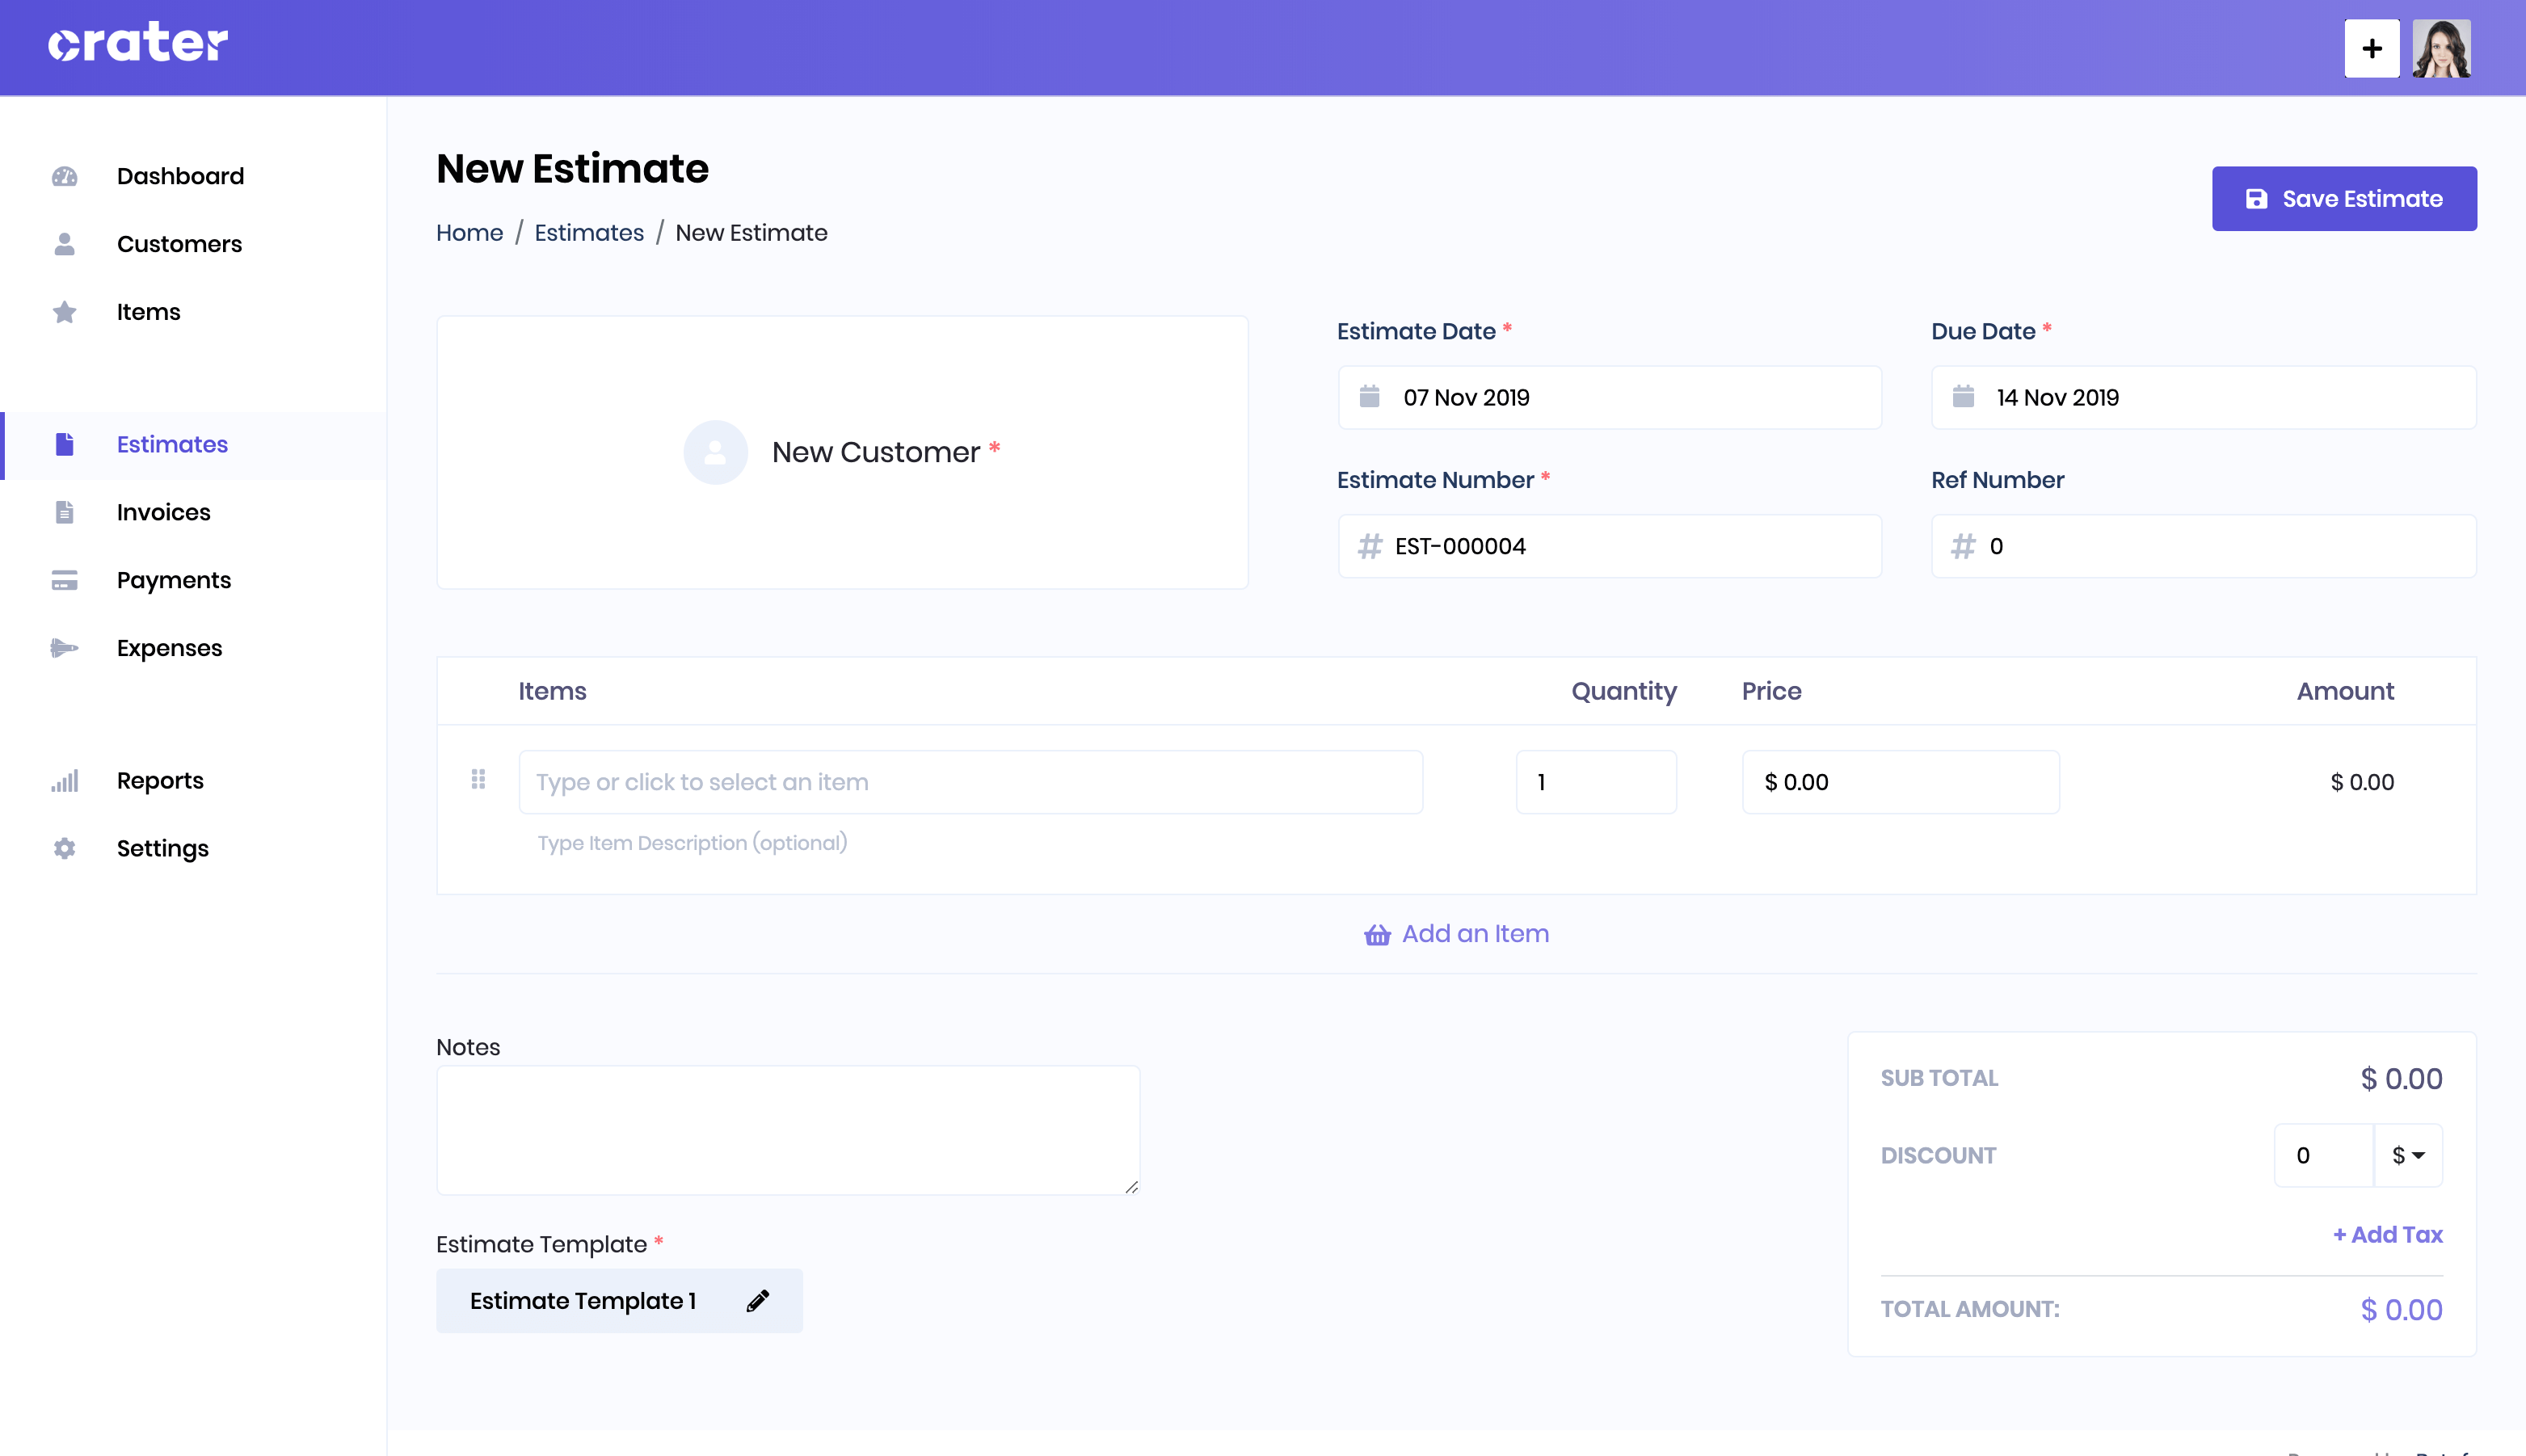
Add New Estimate
An estimate can be created using one of the three pre-designed templates. You can add additional taxes to the estimate and also add it as a compound tax.
Once an estimate is created you can edit, view or mark it as sent. You can also convert a created estimate to an invoice.
Invoice Fields:
- Customer: Your customer whom you'll be sending the estimate.
- Date: Date of the Estimate.
- Expiry Date: Date of the day when the Estimate will become Expired.
- Estimate Number: Unique Identification number for the Estimate. Its automatically generated each time you create a new estimate.
- Items: Estimate Items with Name, Description, Quantity, Discount of the Item.
- Notes: Extra details that you would like mention on the estimate.
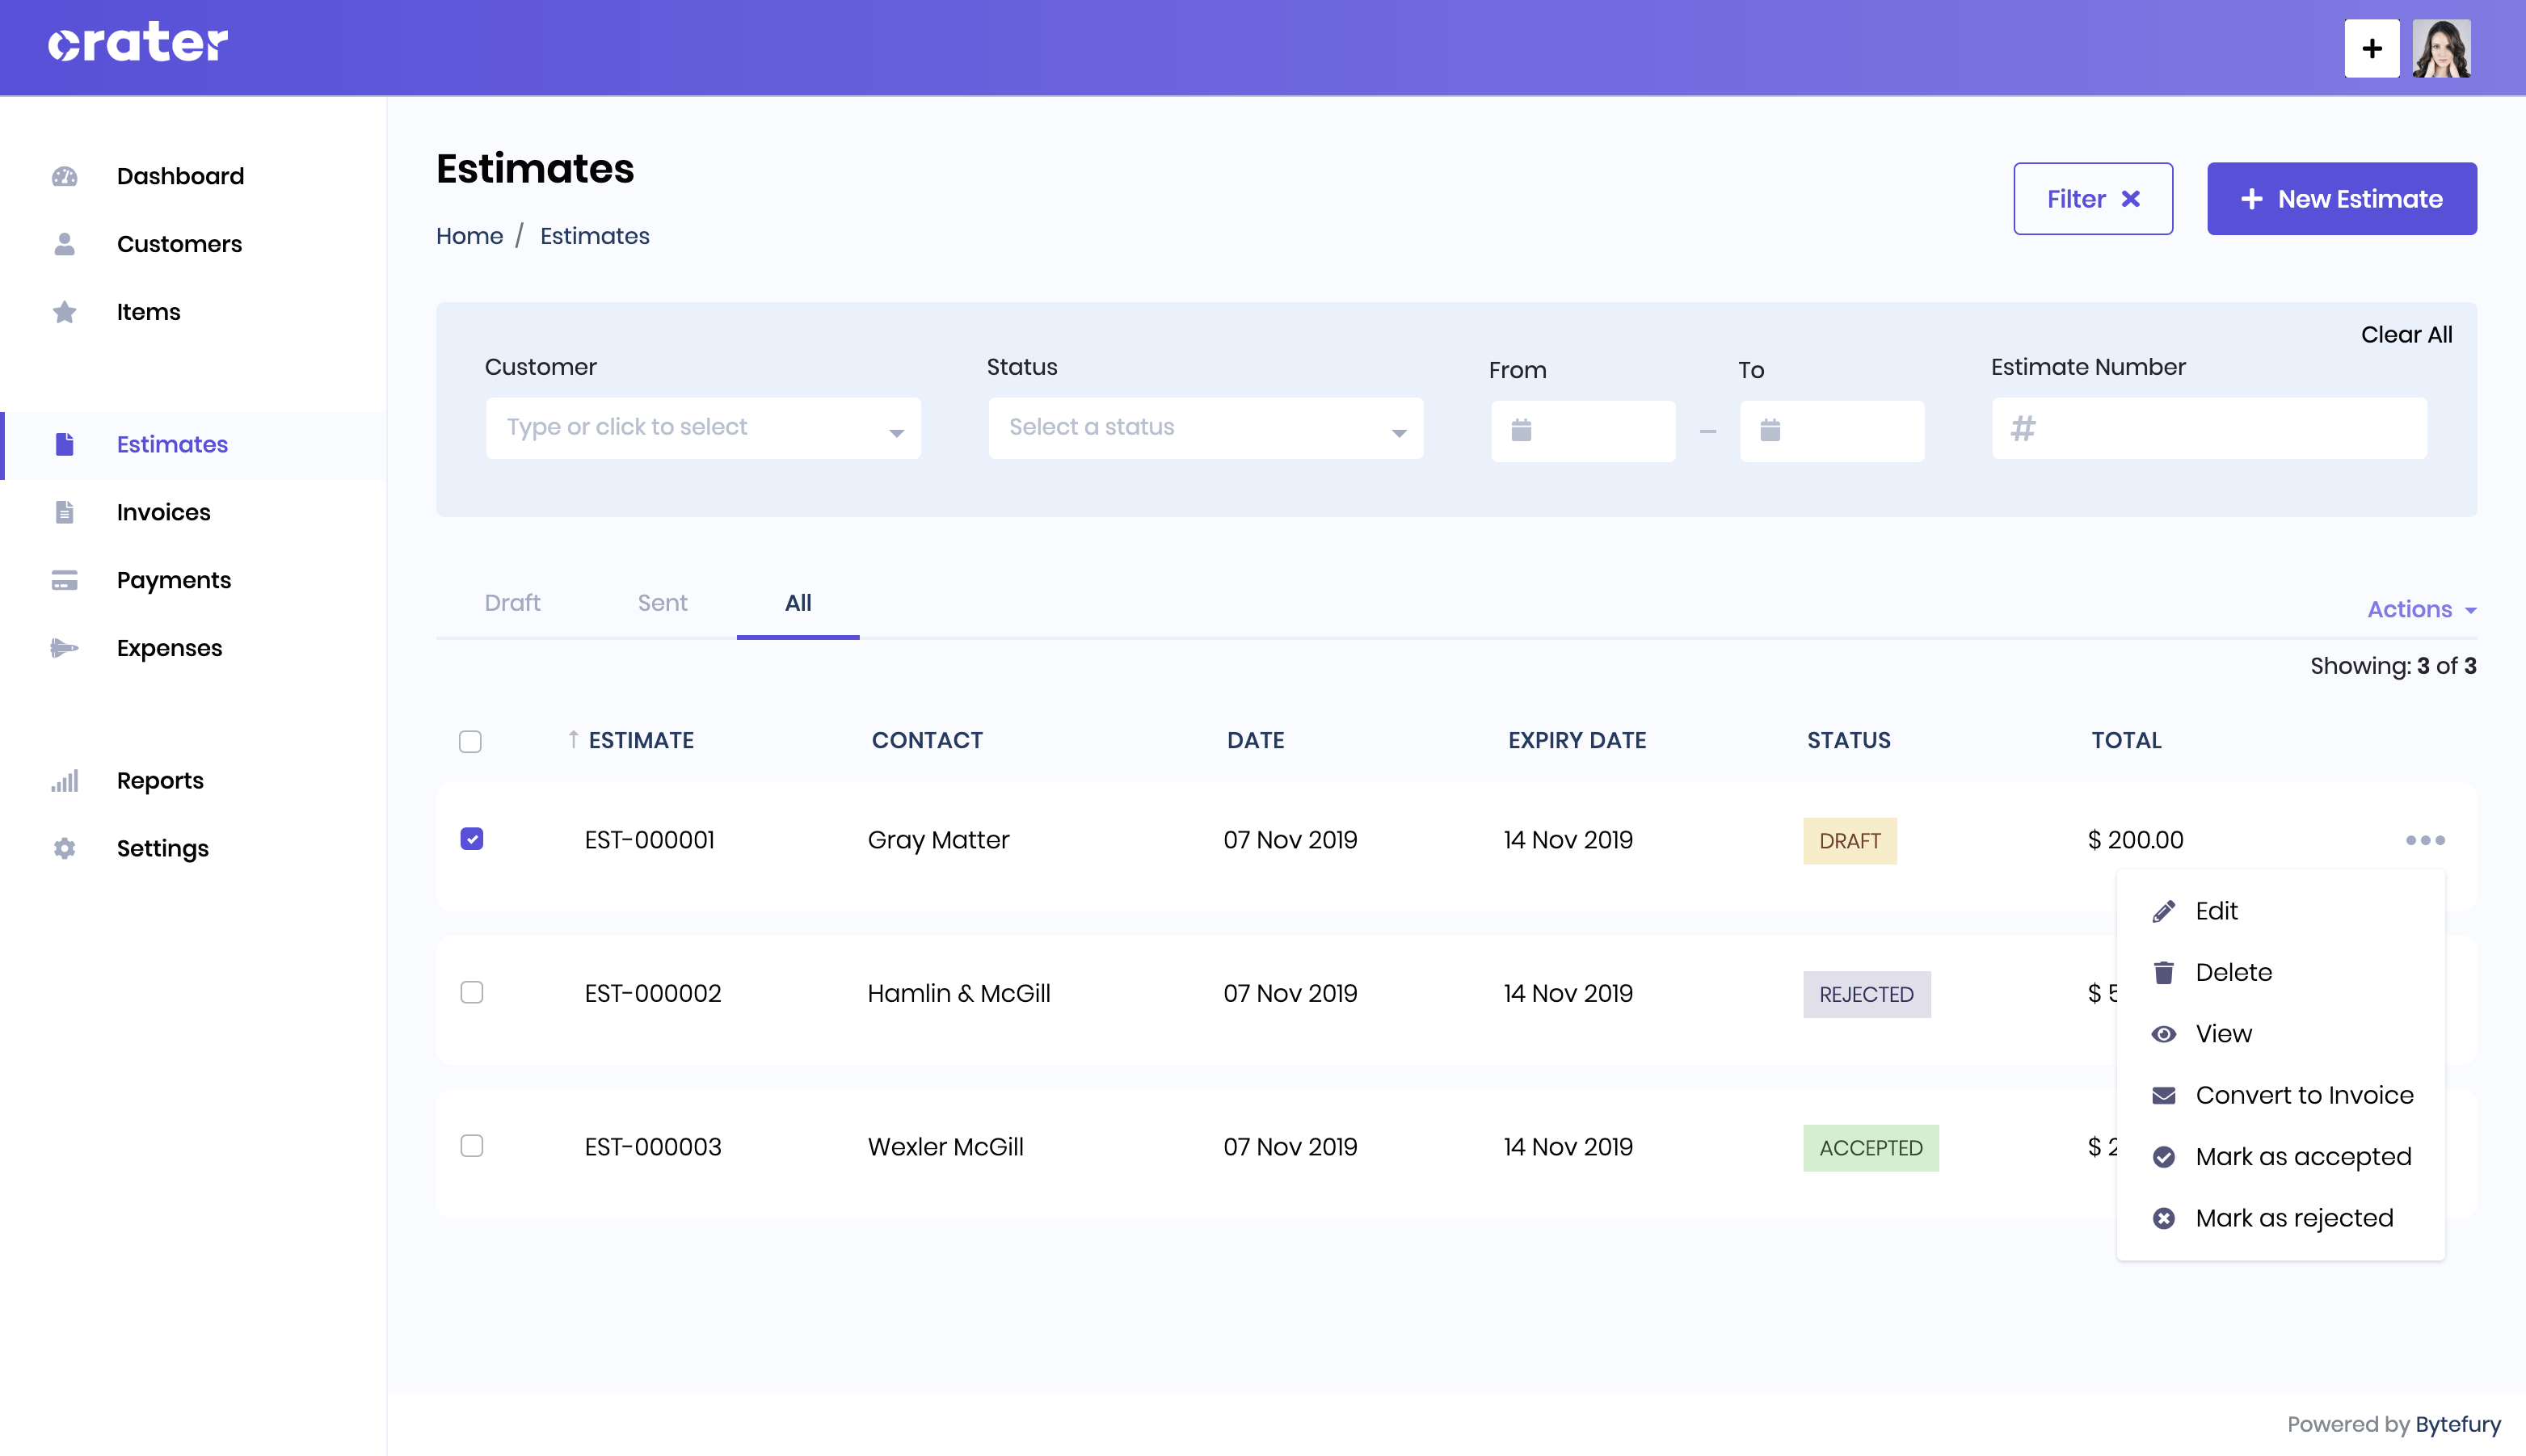
List Estimates
All created estimates are shown on the Estimates page and you can easily edit or delete them as well. You can also use filters to quickly search for a particular estimate by its customer, status, date and number.
You choose to send an estimate directly from the application or mark the estimate as sent. You can also manually mark the estimate as Accepted or Rejected.
Note that: When an Estimate is converted to Invoice, it automatically gets marked as accepted.
Estimate Lifecycle
Below are the different statuses of an estimate:
- Draft: Estimate has been created but hasn't been sent to the customer.
- Sent: Estimate has been sent to the customer
- Viewed: Estimate has been viewed by the customer
- Expired: Estimate has passed the
expiry_dateset by you - Accepted: Estimate has been accepted by the customer. ( Note: When you convert an estimate into invoice, it automatically gets marked as
Accepted) - Rejected: Estimate was rejected by the customer.